Sunday, July 23, 2006

Good mouse? Worn-out feet? Have a spare dead mouse?

If you have an older, dead mouse lying around, don't throw it away just yet!!! You can actually try to salvage the the teflon feet from the bottom of it. These teflon feet are the things that allow your mouse to glide with such ease over whatever mouse-pad or surface you use. But without it, using your mouse would be such a... "drag"... lol.

I've gone to websites such as Xoxide.com, who sell replacement teflon feet for seemingly any mouse. But for people who choose -not- to buy stuff online or are hella cheap and frugal... like me... well the method above is the perfect if not the only solution.

What you need is any old, non-working mouse that has some teflon feet to scrape off from, a glue gun with a glue stick, and of course the other -WORKING- mouse you intend to stick the feet onto.

I took the feet off of a dead Logitech MX-300 (optical) and installed it onto the optical mouse for my Power Mac 6100.

Here's some pics:


Friday, July 14, 2006

That hard-to-find Japanese site and a 6100 converted to a Windows PC (son of a...)

Okay, I mentioned that I saw a 6100 with a blue LED on a Japanese website... I FOUND IT!!!

The original site in Japanese: < HERE >
The same site, but translated by Google.com < HERE >

Son of a... dang!!! This guy (or these guys?) is L337! And btw, I'd really like to know where he got that "6100/G3" lable to put on the 6100's case..... any clues?

In other news, there's this dude who posted on the MacMod website that he successfully gutted out all the Mac innards of the 6100 and replaced all of it with PC components... very interesting. I only wish that more of the common mini-ATX power supplies (PSUs) worked with the 6100's motherboard and power-switch button/mechanism. :-(

6100 - Mini ATX Mod: < HERE >

Speaking of which, has anyone ever successfully replaced the internal fan inside the 6100's power supply? Uh..... anyone else ASIDE from that Japanese dude from earlier?!?

Tuesday, July 11, 2006

Alternate way to install Mac OS 9.1 (possibly even 8.x.x)

If you ever had to do a fresh install of the Mac OS (7.5-9.1) on your 6100, you probaby down-right-left HATED it when you had to boot off the slow internal 2x CD-ROM drive (stock). Even if you have a G3 card installed on your 6100, you'd still have to wait through the initial Mac OS install process in order to take advantage of your G3 card's driver software.

Well wait no longer!

I've just figured out an alternate way to install or reinstall your Mac OS (8.x or 9.1) onto your 6100 while having the luxury of running with the G3 upgrade card enabled! What's more is that from this point on, you can ALWAYS do an 'accelerated' clean install with this process!

Forget what Apple said about absolutely needing to boot of the CD to install Mac OS 9.1... For some reason, this method allows you to completely bypass that restriction!

All you need is a Zip or Jaz drive with a corresponding Zip or Jaz disk.

Here's the basic process...
  • 1) Simply restart your 6100 using the bootable Mac OS 9.1 CD (this may or may not work with Mac OS 8.x)
  • 2) Insert your Zip Disk or Jaz Disk
  • 3) Do a "Base Install" of -ONLY- the "Core System" software onto the Zip/Jaz disk
  • 4) When the installation's complete, install your G3 card's drivers onto the Zip/Jaz disk
  • 5) CONGRATULATIONS!!! You now have a G3-accelerated bootable Zip/Jaz disk!

From this point onwards, you can now boot off this disk and then insert your Mac OS 9.1 CD and install/reinstall the Mac OS onto your main hard disk........ but only this time, it's noticibly MUCH FASTER!

If for some reason the "Core System" installation does not fit the 100 MB Zip disk, you can simply use the Iomega Tools software to create a "Rescue Disk" of the working Mac OS 9.1 installation currently on your hard disk. Just be sure to install the G3 card's drivers onto it once you're finished.


Here's an extra tip.
After installing the Mac OS onto your Zip 100 disk, I would imagine you have a good 20-25 MB of free space left on it. What could you do with that space? Well, here are some suggestions of usefull software to include:

  • 1) "ADB Renewer 1.1" - You absolutely need this if your mouse isn't working if booting off of the Zip disk... while you're at it, you may also want to install this onto a floppy disk if the ADB connection on your 6100 is fried like mine is (after all those accidental "hot-swapping" incidents).

  • 2) "Disk First Aid" - If you have a non-Apple hard drive installed in your 6100, chances are, you'd need to be able to diagnose and correct any problems on the disk as they arise.

  • 3) "Drive Setup 1.7.3" - You use this to format your drive according to whatever partitioning needs you have.

  • 4) "Apple HD SC Setup 7.3.5" - Now... if you need to install Mac OS 7.5.x or 7.6... or even Linux.... this is the one you'll need.


Here's YET ANOTHER extra tip.
If your ADB bus is fried like mines is and is also acting flakey (works poorly or intermittently stops working every once in a while.....ON IT'S OWN), it would really help if you put an alias of the "ADB Renewer" program in the Startup Items folder in your System Folder....... for both the Zip Disk and your main Hard Disk.

Tuesday, July 04, 2006

"Energy Bliss" for Kaleidoscope 2.3.1

Well, one of the things I always loved about using the Macintosh back in the late 1990's was when we had this little shareware utility called "Kaleidoscope", which allows for Mac users to alter their Mac OS's appearance on so many levels: window styles, custom icons, custom cursors/pointers, transluscent menus complete with dropshadows, and even the ability to incorporate one's own custom WindowShade sounds!

Alas that I have just gotten into creating Kaleidoscope color schemes only 4 years after Mac OS X came out and 5 years after Steve Jobs hammered the final nail in Mac OS 9.x's coffin. :(

Oh well, this little color scheme which I named "Energy Bliss" is my first and most recent attempt at making anything for Kaleidoscope. It's my own 'weird' blend of the Windows XP Media Centre visual style... plus a few icons from the upcoming Windows Vista operating system. Not bad for a first try huh? Well, it's still not complete..... but maybe some day when I get the strength and motivation to work on it again, I may finish it just yet! But until then, I leave it up to you, the guy or girl who's going to download this thing. That's right... I'm letting -YOU- modify my color scheme to however you want it to look or behave!

I recently decided to just make a permanent home for hosting this little color scheme and found FileFront.com to be a pretty decent place to do it. So, below are some pics of the scheme in action. The first one is of a previous build..... the second one is of version 0.6.5 beta.


Download (and enjoy!): Energy Bliss 0.6.5 beta
WARNING: This file is intended for use on an actual working Mac OS 8.5.x-9.x. I have absolutely no idea how this color scheme will work under Mac OS X's "Classic" environment..... nor if it will work at all (since i don't use Mac OS X). Also, if you use the Macintosh emulator "SheepShaver", there's a noticeable bug that doesn't allow for Kaleidoscope to correctly draw the included custom Hard Disk Drive icon(s).

Sunday, July 02, 2006

The PM 6100 and -TODAY's- WorldWideWeb...

If you read through some of the "Embracing Obsolescence" articles on the LowEndMac.com website, it'll give you a list of available web browsers for the obsolete Mac OS 9.x, 8.x, and 7.x. But in ALL cases, I recommend a combinationg of iCab (www.icab.de) and the latest version of Microsoft Internet Explorer that your Mac OS Operating System can use. Those are your best bets since there is no such thing as a Firefox build for MacOS Classic (MacOS 8.x-9.x).... and nor would i think there will ever be such a port.

But keep in mind that Microsoft has since discontinued support of MSiE for the Macintosh since January 31st, 2006. So, the only place to download old Mac versions of MSiE would be at thise repository: (http://www.mirrorservice.org/sites/browsers.evolt.org/browsers/ie/mac/) If you're using Mac OS 7.x, you'll have to stick to MSiE v4.5. If you're on 8.x to 9.xx, you can use up to MSiE 5.1.7.

If that website ever goes down, you can also check: (http://pure-mac.com/webb.html#mie)

Also, if you do plan on browsing the web at ALL on a 6100, you absolutely -MUST- get the G3 upgrade. Otherwise, you'd have to wait minutes for certain pages to render on screen........ -EVEN- if you're hooked up to a broadband internet connection.

You should also consider upgrading the MRJ (Macintosh Runtime for Java), Flash/Shockwave, and QuickTime plugins..... each of them also available from the Pure-Mac.com website.

Most compressed Macintosh file archives found on the Internet are either in .SIT, .BIN, or .HQX formats. In this scenario, i recommend getting the Stuffit expander from Allume.com

Recommended Upgrades for the 6100


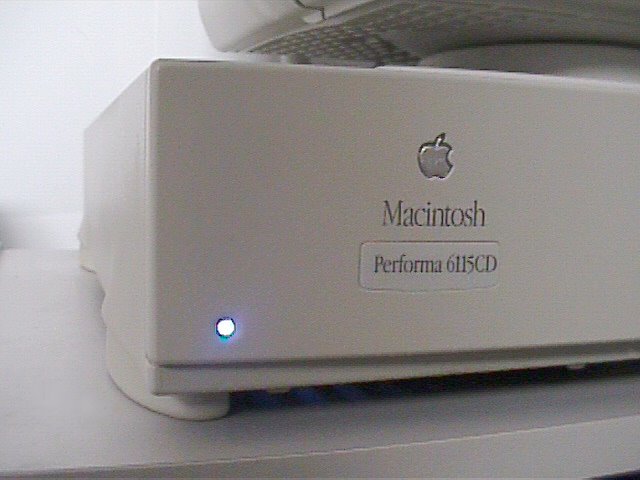
If you're using any stock 61xx series Macintosh in this day and age, you're either a Linux user, or just crazy..... or more of a hard-core loyalist than me!!! (eek!)


In any case, chugging along at 60 MHz, 8 or 16 MB of RAM (depending on where you bought it and when you bought it), and a miniscule 350-500 MB Hard Disk Drive, just isn't a way to go these days.

But before upgrading, you might stop and ask yourself: "But dude... isn't it just better to get an all new Macintosh system, complete with up-to-date software?" My best answer would be: "it depends". It really depends on what your needs are, how much you're willing to invest, and what kind of software you have on it already.

If you just plan on creating graphics and playing with Photoshop 3.x-6.x and light web browsing, upgrading the 6100 would be a good idea. Otherwise, if you're a real hardcore media freak, or need to access all the new USB or FireWire peripherals out there, the choice is clear... BUY A NEW COMPUTER (Mac or PC).

But let's say for the sake of argument that you want to upgrade your 6100. What would you get?

MEMORY
The first area that would be the easiest to upgrade and would provide the most noticeable performance increase would be the RAM. Typically, you would need to consider what kinds of programs you're running and the Mac OS version you'll be using when determining how much you need. But since this this machine is pretty much obsolete, i'd say to just -MAX IT OUT-. Buy as much RAM as you can afford. All of your old programs would behave more stable than they would if they had to fight over their share of such a precious resource. The old "maximum" amount of RAM that Apple suggests is 72 MB. Back then, the largest SiMM memory modules only came in sizes of 32 MB per module. But that was litterally last century. There are currently SiMM memory modules that come in sizes of 64, 128, and 256 MB per module.

Although there is mention on Kan's website (www.kan.org/6100) about a guy who was able to have about 512-520 MB, I recommend against this for a number of reasons:

1) It's too damned expensive to pay for an obsolete piece of technology. You can get FAR more memory for a new computer at the price it would cost you to get a SiMM upgrade for this computer.

2) Most Mac programs designed for Mac OS 7.x-9.x and "pre-G3" Macintoshes don't usually need more than an average 8-32 MB.

3) Heat issues. I did some research on Google.com and found that there were consistent reports of heat-related problems concerning the use of individual 256 MB memory modules in the 6100.

So, a sensible -TOTAL- amount of RAM to have would be in the 72-264 MB range. I called Edge (http://www.edgetechcorp.com/), a well-known manufacturer of memory upgrades for both Macs and PCs and asked about the 256 MB kit that they sell. The guy told me that it is actually a set of TWO 128 MB modules that will upgrade the 6100 to a total of 264 MB (there is a total of 8MB soldered on the motherboard).

Hard Drive
You should also use a similar approach when deciding how big of a Hard Disk Drive (HDD) to get. I personally have an internal 4.5 GB SCSI drive in my 6100. Although you can purchase a higher-capacity and faster SCSI drive from certain websites, I recommend against it for the following reasons.

1) Too expensive for old technology. You can get a VASTLY larger HDD for a more recent computer system for the same price.

2) Even if SCSI HDDs are significantly faster than the typical IDE or ATA drives currently in most modern computers, the 6100 limits the speed of any SCSI device to it's maximum bandwidth of a puny 5 MB/s.

3) Most Mac programs designed for Mac OS 7.5 to 9.1 usually don't need more than 500-700 MB of -FREE- Hard Disk space.

Processor
This is an easy one. If you plan on using Mac OS exclusively as your Operating System, go to Sonnet Technologies and get yourself a $200 Sonnet Crescendo G3 NuBUS upgrade card. It'll take you to either 480 MHz or 500 MHz, depending on wether you have a stock 60 MHz PM6100 or a 66 MHz PM6100 respectively.

However, due to Sonnet's incompatibility with Linux, you would have to go to auction sites like eBay to find a G3 upgrade card made instead by NewerTech, which has since been discontinued. Only the NewerTech G3 cards manage to somehow work with the Linux distros.

Mac OS
If you only plan on doing light media authoring work, I recommend downloading Mac OS 7.5.x from Apple's website for -FREE- and then updating that to 7.5.1, 7.5.3, and then 7.5.5 subsequently in that order.

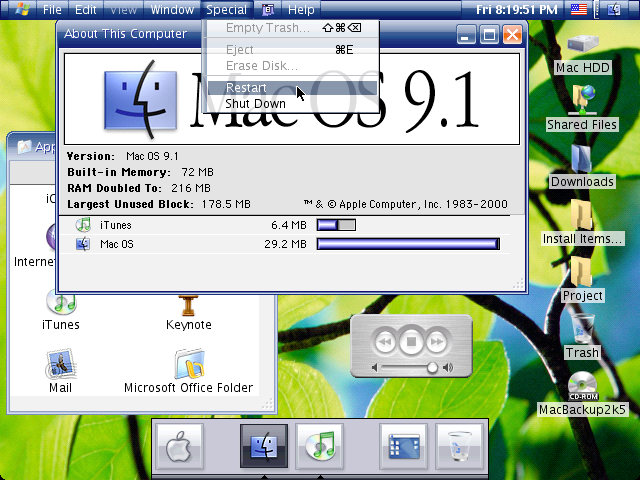
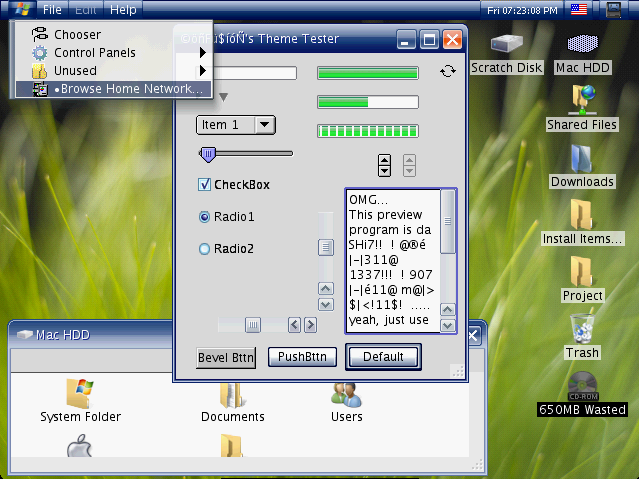
Otherwise, if you can get your hands on Mac OS 8.5.1 or 8.6 or 9.1, get those instead. Not only do they better support modern web browsers like iCab, they provide a much more streamlined and intuitive interface than 7.5.x.
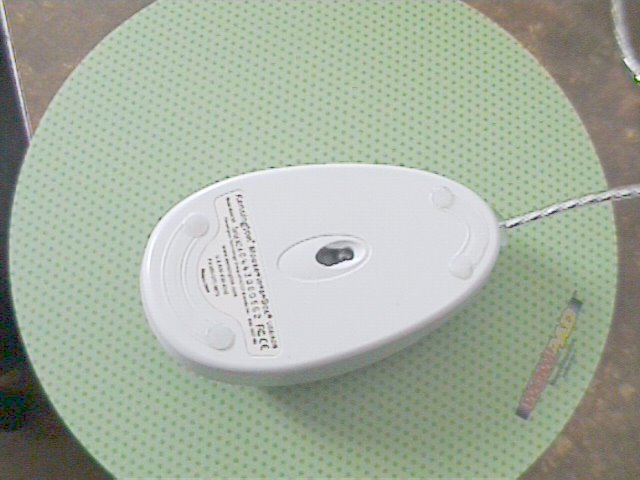
Miscellaneous Upgrades
1) ADB/USB "Optial Mouse*in*a*Box" by Kensington.

2) "ADB Port Expander Switch Box" available at WeLoveMacs.com

3) "MAC-VGA Adapter" (Part # F3H1381) by Belkin. If your old monitor is dying out, your only choice for replacement monitors would be in the realm of VGA CRTs. And since the stock 6100 lacks the kinds of connectors to use a VGA display, you would absolutely need this.

4) Any "AAUI Ethernet Transceiver". If you ever plan to connect your PM6100 to a DSL or Cable modem or even to a router, you'll need this in order to be able to connect a standard CAT-5 Ethernet cable to your 6100. A VERY good selection of these transceivers can be found at WeLoveMacs.com.

5) "A/V" or "HVP" video card. If you need more viewing space on your desktop or just simply want more visible colors on your images when you're working in Photoshop, you'd probably want to look around on eBay or some Macintosh used parts websites to find this component. Keep in mind that you'd also need both a sort of A/V card mounting bracket and a PDS adaptor card with a PDS pass-through interface. I'd personally recommend against this upgrade if your 6100 currently has problems keeping cool.

Tips:
As mentioned on the LowerEndMac.com website, cleaning the dust out of a Power Supply Unit (PSU) should get a seemingly "dead" one back into operation. Although that same website also mentions replacing the internal PSU fan with a 25 cm fan, that's actually harder to do and is potentially dangerous to both you and the PSU. Instead, I would rather choose to clean out the dust.

Keep in mind that I take NO responsibility on what happens to you or your computer if you choose to follow this proceedure below. Proceed at your own risk.


Here's what I do to clean the PSU's internal fan:

1) Make sure the PSU is disconnected from the power cord and the power cord is disconnected from the electric power outlet. Remove the PSU from the 6100 (follow the instructions that are available in the Power Macintosh 6100 Service Manual available on AppleRepairManuals.com).

2) Place the PSU on a smooth, clean, flat surface (prefferably a wooden table or countertop). Using a narrow vaccuum cleaner hose, clean out the tiny holes and crevaces of the PSU as best as possible.

3) With some cotton swabs, gently clean the internal fan by wiping away the excess dust.

4) Gently blow into the PSU, turn it upside down, and lightly shake it left and right and then up and down to remove the chunks of dust. Vaccuum any that wind up on the outter grill of the PSU.

5) Using a long and narrow wooden toothpick, gently clean the internal wire mesh grill just behind the blades of the fan by lightly poking through the tiny holes where air is supposed to flow through. Repeat step 4 as many times as needed to remove any loose particles.

While this seems COMPLETELY un-professional, this method actually works and the PSU in my 6100 has been working 3 years since i've done this proceedure.

Saturday, July 01, 2006

Change the 6100's power indicator LED from green to blue (or virtually any color you want).


Ever wanted to give more visual appeal to your 6100? You can try changing the LED light from the typical green to virtually any color of LED you want.

I did this just days after seeing it done both on a Japanese website about modifying the 6100 and a picture of a 6100 with the blue LED on Danaquarium.com.

Below is a 'guide' of how i accomplished this.

WARNING: I take no responsibility in what you do to your 6100 or how you do it. This particular guide is written by a college student with NO 'professional' soldering experience. Proceed at your own risk.

I recommend the Blue LED from RadioShack (model: 276-316) since that is the one I'm using for this 'installation guide'. It is a 5mm LED, that uses 3.7 volts and, in terms of brightness, is rated at 2600mcd (milli candela).


Among the other items you'd need are:
1) any 15-30 watt soldering iron (set at 15 watts)

2) soldering paste

3) some lead (try to use the lead solder that is intended for electronics and not the one used for plumbing)


4) Kronus "Helping Hands" (to hold the LED and LED cable/wires in place)


5) heat-shrink tubing

6) utility knife or box cutter

7) hair dryer

8) tissue paper (to protect the LED and the LED cable from getting crushed, punctured or ruined by the clamps of the Kronus "Helping Hands")

9) wire cutter

10) flat-head screwdriver

11) PATIENCE and steady hands... obviously you don't want to break the thing....


Here are the steps:

Remove all of the internal components from the 6100 in the following order. This includes:

1) The top case cover. Lift up the 2 tabs on the back of the case to open it.

2) The hard drive
Remove the EMI (electro magnetic interference) shield. Unplug the power connector lead and the SCSI data cable. Then slowly and carfully pull out the hard drive.

3) The CD drive
Remove the EMI (electro magnetic interference) shield. Unplug the second power connector lead, the SCSI data cable, and that smaller third plug (which i believe is for sound output).

4) The Floppy drive.
This was tricky for me at first since removing it is NOT the same as the first two drives. To remove the EMI (electro magnetic interference) shield, you MUST remove the CD drive in order to slightly pry open the protective, plastic tabs closest to the power supply that locks the floppy drive in place. Once the drive is slightly out of the chasis, unplug the data cable.

5) The power supply unit.
Unscrew the PSU and uplug the final power lead that connects to the motherboard. This may require you to use a flathead screw driver to actually pry it open. If you over-bend it while prying it, making it loose, it should be okay, just so long as you don't rip the whole thing out of the motherboard. Also, this part will require a significant amount of physical strength to pull out.

6) The motherboard.
Remove any G3 upgrade cards or such, and memory upgrades. Unplug the final plug of the SCSI data cable from the motherboard (it may help you to simply lable that particular portion of the cable that goes to the motherboard with a black permanent marker). Unplug the small , brown, LED cable that is underneath the hard disk drive bed. Unplug the speaker cable that's underneath the CD drive bed. Unscrew the tall white plastic column with the screw driver to remove it, and unscrew the exposed screw which is closest to the CD drive. In total, there are only two screws for the motherboard. You can rest the motherboard on a clean piece of cardboard or paper on the table so as to not cause any static or dust damage to it's components.


7) The plastic HDD/CD/Floppy drive holder.
This piece of sh!t is physically -THE HARDEST- part to pull out. I recommend following the guide available at AppleRepairManuals.com to get the details. It's a .PDF file so you'll need to use Adobe Reader to view it. If it's not available there for any reason, do a Google search for "Power Macintosh Service Manual".

8) Remove the LED cable from the 3-drive holder.


NOW here comes the fun part: Changing the LED.

1) Gently splice open the rubbery heat-shrink tubing that covers each wire between the LED bulb and the two wires.

2) Place the LED cable on one of the clamps in the Kronus Helping Hands tool. I recommend wrapping some tissue paper over the wires before putting it in the clamp so as to not puncture the wires.

3) Unsolder and remove the old LED. Do NOT keep the soldering iron's tip on the solder points too long since prolonged exposure to the intense heat will damage the LED. (In case you should ever want to revert it back to the old LED....)

4) Cut the anode and cathode of the new LED to match the length of th old LED.

5) Wrap the new LED in some tissue paper or a rubber band before putting it in the "Helping Hands" clamp so it won't get cracked.

6) Put some heat-shrink tubing over each wire BUT slide it several inches past the exposed parts of each wire so that you can slide it over the soldered connection when you are -CERTAIN- the LED works.

7) Solder the new LED to the LED cable. It helps to know this tip: "Black wire to cathode, Red wire to annode." The "a" in the picture is the annode, and "k" is the cathode. You must also make sure that not too much of the molten lead gets in between the wire and the anode or cathode or else you wont get a good enough connection when electric current goes through.


8) TEST the newly soldered LED. In order to do this, temporarily reinstall the motherboard and power supply unit back into the 6100 and reconnect the power lead from the PSU to the motherboard. Then reconnect the LED cable to the motherboard. Plug in the 3-pronged power cord to the power supply and then to an available power outlet. Then, turn on the power. If the LED cable lights up, then you're good to go.

9) Unplug the PSU from the power outlet, unplug the power cord from the PSU, unplug the power lead between the PSU and the motherboard, remove the LED cable and then remove the motherboard.

10) Slide the heat-shrink tubing up and towards the new soldering points so as to cover it as completely as the old tubing did. And using a hair dryer, apply just enough heat to seal the tubing. (it doesn't have to be -too- tight)


Here is the reinstallation process (IN ORDER).


1) Reconnect the LED cable to the 3-drive holder.

2) Reinstall the 3-drive holder to the metal chasis of the 6100.
If the two plastic locking teeth underneath the CD drive section of the holder breaks off, it's actually OKAY. Just proceed with the reinstallation.

3) Reinstall the motherboard

4) Reinstall the Power Supply Unit

5) Connect the PSU lead cable to the motherboard

6) Connect the tiny LED cable connecter and the tiny speaker connector to the motherboard.

7) Reinstall the SCSI data cable to the motherboard.

8) Reinstall the Floppy drive, then the CD drive, then the hard drive in that order. Then reconnect the data, power and sound cables as described above in the internal component removal process. Don't forget to reinstall the EMI shields as well. (I didn't reinstall the EMI shields on my 6100, but you -SHOULD-, just to be on the safe side).

9) Reinstall any RAM upgrades or any upgrade cards to the motherboard.

10) Close the case, reconnect all the external cables, and power it on!

Here's some before and after pics from Danaquarium.com.

USB Optical Mouse with a Power Mac 6100

This first entry in my newly created blog is about getting a USB -OPTICAL- mouse to work with a stock Performa 611x-series computer or Power Macintosh 6100 model.

The one thing i hate about the 6100 is that it only comes with -ONE- ADB port, which is intended for the keyboard. Usually, the keyboard would then have an ADB port built right in it so as to allow an ADB mouse to then connect to that.

Chances are, you probably have the stock Apple Design Keyboard, which looks something like what i have below... (mine is custom painted black).

(model#: M2980)


Now, let's say you need to replace the Apple Desktop Mouse II that came with your 6100. Good luck!!! The best and -ONLY- replacement for that mouse TODAY (as of July 2006) would be the Kensington Mouse*in*a*Box USB/ADB (model: 64475F), which are in the series of pictures below. It roughly costs $24-$26, depending on where you buy it. I got mine from CompUSA in 2005 and i believe they still carry this model. If not, you can always get order it directly from Kensington. It comes with a "USB->to-> ADB" connector that will allow -ONLY- this particular mouse to work on virtually ANY Macintosh that uses the ADB peripheral interface.

If you wish to use this mouse with your 6100, you normally would not be able to with the Apple Design Keyboard above because the little hollowed-out niche designed for the plug for the ADB Mouse II is just too small to fit both the USB->to->ADB connector and the Kensington Mouse's plug. And as I said, there's only ONE ADB port on the back of the 6100.

What's the solution?? You would have to get an ADB Port Switch Box For Macintosh (model: MD4-103) which is available from We Love Macs (http://www.welovemacs.com/md4103.html) for about $20. This item allows you to plug the Keyboard to the back of your 6100, the ADB Port Switch Box to the keyboard, the USB->to->ADB connector to the box, and then the USB mouse to the USB2ADB connector. Below are some pictures to illustrate this setup:

The plug from the ADB Port Switch Box connects to the hollow, bottom niche of the keyboard.


The USB-to-ADB connector connects to the Box, and the Mouse connects to the USB2ADB connector.


Here's proof to show that it actually works.


WARNING: Do NOT treat this mouse like any regular USB mouse. Common sense should tell you that since Macintoshes with ADB were -NOT- designed to handle "hot-swapping" of peripherals as we do today with USB and FireWire devices, you should -NEVER- "hot-swap" this nor any device from the 6100 or any non-USB Macintosh.

I did this by accident and now -EVERY- ADB peripheral i plug into my 6100 no longer works 100% correctly. Like when i hold down a key on the keyboard to type a repeating character, sometimes the key doesn't stay down. Or sometimes, the mouse (well, rather -ANY- mouse i use now) causes the cursor to jump around the screen wildly even if i'm not touching the mouse.